Chrome / Edge 138+ — "Allow User Scripts" toggle (recommended)
- Right-click the Tampermonkey toolbar icon → Manage extension.
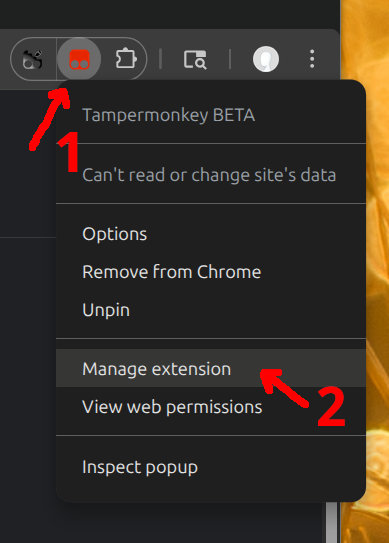
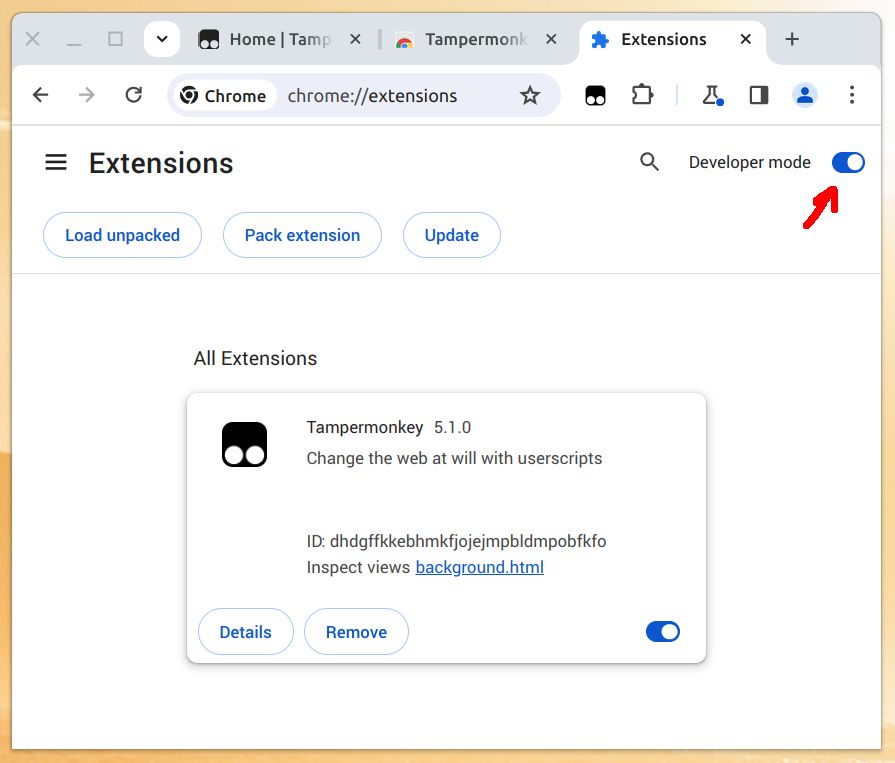
- Turn on the Allow User Scripts toggle.

A Tampermonkey userscript for SEO managers — shows the main-content boundary, editorial links, and blank or broken images, each toggleable. Exports outline-with-context, opens filtered GSC views, runs on every NSN site automatically.
Renamed from NSN Main-Content Inspector, and the former NSN Image Highlighter is now one of its layers. If Tampermonkey lists either of those separately after you install, delete them — they are superseded and the old Image Highlighter does not run on newer sites.
Install / Update (direct) Get TampermonkeyFive steps. After this, you'll get silent auto-updates within 6 hours of every new release — no reinstall, no manual checks, no prompts.
If you don't already have it: Chrome — install in one click from the Chrome Web Store. Other browsers — follow Tampermonkey's install guide for Edge, Firefox, Safari or Opera.
Chrome-based browsers need an extra permission before Tampermonkey can execute userscripts (the script installs fine without it, but stays inert until this is on). Do one of the following — Firefox and Safari users can skip this step.
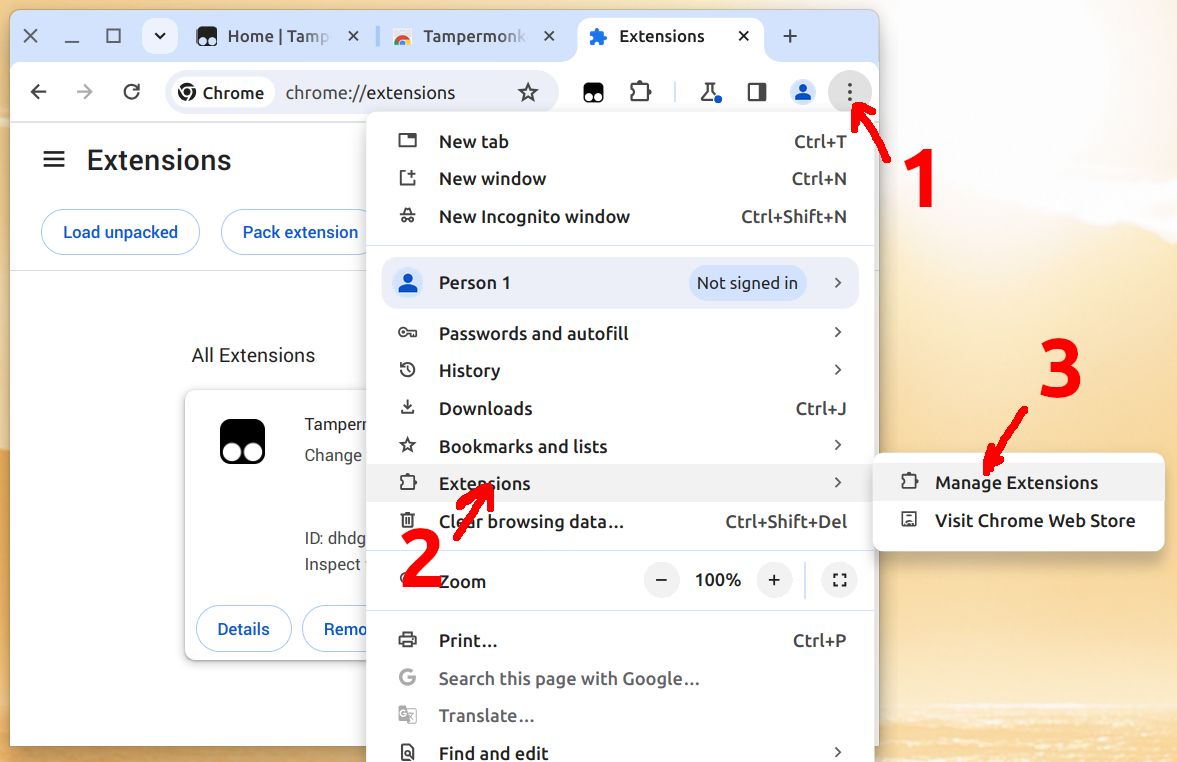
chrome://extensions (or edge://extensions) — e.g. browser menu ⋮ → Extensions → Manage Extensions.
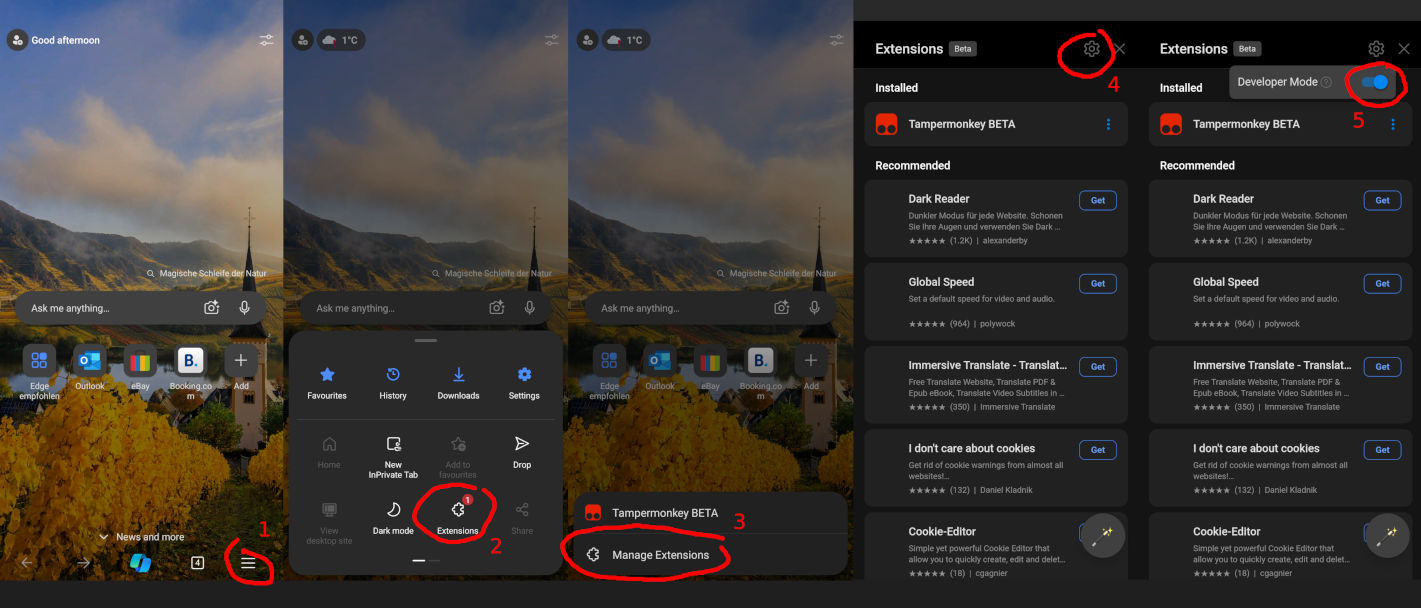
On Edge for Android, enable Developer Mode following this sequence:
Why is this needed? See Tampermonkey's FAQ Q209.
Even with the toggle above on, Chrome can still block the extension until its Site access is set to On all sites. This is easy to miss — the right-click Manage extension menu does not lead here, so go the long way:
chrome://extensions (or edge://extensions).
Pick whichever is easier — both result in the same install with auto-update baked in:
If your browser downloads the file instead of opening Tampermonkey's dialog, use the manual path below.
This is what makes the script self-updating — do it once and you're set forever. After installing the script:
Every 6 Hours (the most aggressive option).Done. Visit any NSN site (e.g. footballwhispers.com) — the
floating 🔎 button appears bottom-right. Hover for the
menu.
Hover the ◆ button, bottom-right of any NSN page:
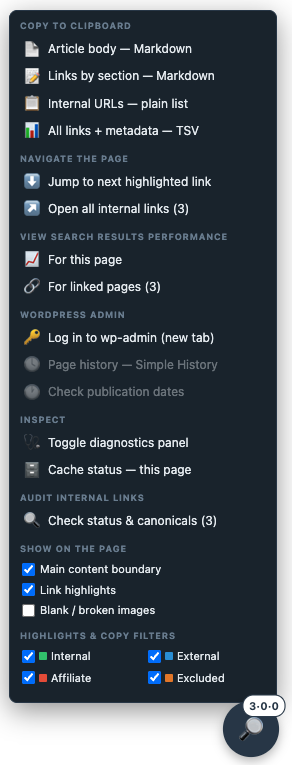
Show on the page is where you turn each layer on or off. Blank / broken images is off by default — tick it when you are auditing images, untick it to read the site normally. Your choice is remembered across pages.
Turn it on per session: ◆ menu → Show on the page → Blank / broken images. It stays on until you untick it, on every page.
Every image on the page gets outlined and labelled. Four labels:
| Label | Means | Reportable as-is? |
|---|---|---|
| PIXEL | A 1×1 pixel, or a 1-pixel placeholder | Yes |
| UNICOLOR | A single colour: a blank replacement | Yes |
| BROKEN | 4xx / 5xx, or it failed to load | Yes |
| COPYRIGHT | Uploaded while this site was being cleaned, and the file is small | No, check it first |
The first three are measured from the image itself. COPYRIGHT is a hint, not a verdict: it does not look at the image, only at its upload date and size, so a small logo uploaded in that period trips it whether or not anything ever happened to it. Each site has its own date window, because the clean-ups ran per site over different periods.
⎈ copy in the banner and pick
Copy blanked image URLs (every pixel and unicolor image) or
Copy broken image URLs (every 4xx/5xx). One URL per line,
ready to paste into a ticket.
media.<site>.com proxy address, which is a resize and
cannot be re-uploaded. Deduplicated too, so one upload served at five sizes
is one line.Nothing is highlighted? Either the checkbox is unticked, or the page genuinely has no flagged images. If there is no ◆ button at all, the script is not running, so check Tampermonkey is enabled for the site.
Stays out of the way: skipped on /wp-admin/,
/wp-login.php, and other back-office contexts.